How to Convert External Hard Drives from FAT32 to NTFS
Windows XP (All versions)
Note: You can do this with an internal drive, other then your C (Windows drive) too! However don't do this with a drive that contains data!

External hard drives are getting to be very popular these days. They're fast, convenient, and hold lots of data. If you are using Windows XP, you are most likely using NTFS vs. FAT32 for your file system. If you have just purchased a new external hard Drive, be sure you format it to be NTFS (it will be FAT32 by default). It requires a format, so either do it when you first get it, or if you have one and want to convert it, be sure you back up any files on the external drive as all information on the external drive will be lost when formatting it to NTFS. Why FAT32 over NTFS? Why FAT32 over NTFS? Because a FAT32 partition  performs more slowly than NTFS. And an NTFS partition is more efficient because of larger cluster sizes. An NTFS file system can hold more data that a FAT 32 file system.

Here is how to format the file system and change it to NTFS:

Right-click My Computer icon on your desktop and choose "manage" from the drop down menu. Or you can right click My Computer from your Start Menu can choose manage. This opens your "Computer Management" window.

Under Storage, click Disk Management. It may take a few moments for the information to appear.

Right-click on the drive you are changing (make sure it is the right drive), and choose "Delete Partition".

Click Yes on the prompt. You will get a warning that all data will be lost, so double check and make sure you have selected the correct drive, and be sure you backed it up if you are not working with a brand new external drive!

Next, you will see unallocated space for the drive you are changing in the lower right window. Right-click on unallocated space and a menu of available options will appear.

Choose "New Partition" and the "New Partition Wizard" will appear. Click Next. Then Next again.

Choose partition size, click next.

Leave "Assign the following drive letter" selected and click next.

Under "Format this Partition" choose NTFS. Select Perform a quick format and click Next.

Click Finish. You will see that the drive is formatting and percentage complete. If it is a large drive, it may take a few minutes. If it is a drive that has information on it, plan on an even longer time to finish.  Congrats! You are done. Now go fill it up :)


Registry Mechanic - A Cloudeight Endorsed Product
(Advertisement)
Download A Free Trial of Registry Mechanic by PC Tools

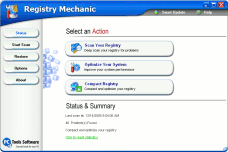
With Registry Mechanic you can safely clean, repair and optimize the Windows registry with a few simple mouse clicks! Problems with the Windows registry are a common cause of Windows crashes, slow performance and error messages. By using a registry cleaner regularly and fixing registry errors your system should not only be more stable but it will also help improve your system performance without expensive hardware upgrades. Download A Free Trial of Registry Mechanic by PC Tools

Registry Mechanic uses a high-performance detection algorithm to quickly identify missing and invalid references in your Windows registry. These problems can occur for many reasons including being left-behind after the un-installation or incorrect removal of software, by missing or corrupt hardware drivers, or orphaned startup programs. Download A Free Trial of Registry Mechanic by PC Tools

With a few easy steps Registry Mechanic will scan your entire registry for any invalid entries and provides a list of the registry errors found, you can then choose to selectively clean each item or automatically repair them all. For your convenience and protection Registry Mechanic can also make a backup of any repairs made so that you can easily recover any changes if required. Try it free now! Download A Free Trial of Registry Mechanic by PC Tools

Make our Start Page your Home Page   |   Close this Window

©2006 Cloudeight Internet