

How to Change Your Name on the Windows Login Screen
This tip is for Windows 10 and Windows 11
Your display name appears above the password/pin form whenever you sign in to Windows. You can change your display name to show up as you want it to on the login screen and in the Settings app.
How to Change Your Display Name if You’re Using a Microsoft Account
If you’re using a Microsoft account on Windows 10 or Windows 11, visit this Microsoft page and change the name shown there to whatever you like.

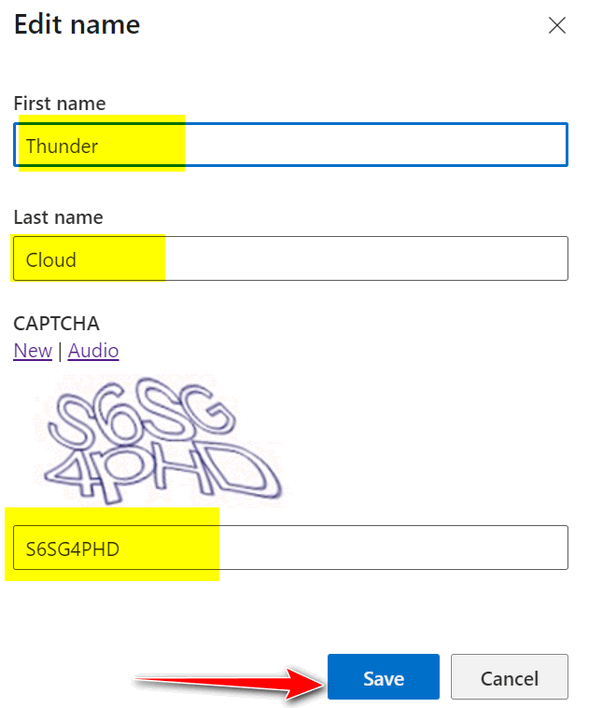
In the Edit name field that opens, enter your first and last name (or whatever name you want to be displayed) and solve the CAPTCHA. Then click “Save” to finish changing your display name. Don’t forget: When you change your Microsoft account name, it changes the display name on all the devices that you sign in with this Microsoft account.
The new name you chose will not show up on the Windows 10 or Windows 11 sign-in screen and Settings app until you restart your computer or sign out of your account and sign in again.
If You’re Using a Local Account
If you’re using a local account, you can change the display name using Control Panel. Type CONTROL in the taskbar search and press Enter when the Control Panel appears in the search results.
In Control Panel, click “User accounts”…
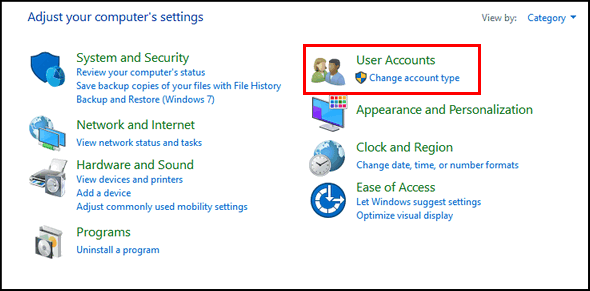
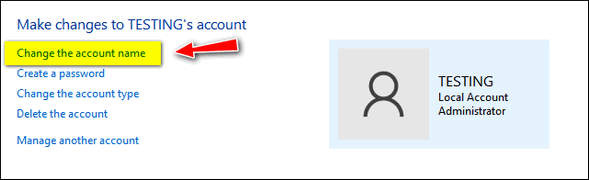
Click “User accounts” one more time. Select the account you want to change and click “Change your account name” to change your display name.
Enter your new display name into the text field provided and then click the “Change Name” button to save the changes.

That’s it. You can now close the Control Panel. But remember — the name change won’t take effect until you sign out or restart your computer.