Have You Ever Seen This Windows 10 Menu?
This tip applies to Windows 10 ( all versions ).
No matter how much we think we know about Windows, we’re always finding something new. Well, maybe not new, just different. For example: The Accessories menu.
The Accessories menu is on all modern versions of Windows: Windows XP, Windows Vista, Windows 7, Windows 8, Windows 8.1, and Windows 10. But back in the days of XP, Vista, and even in Windows 7, Accessories was listed under “A” alphabetically; but in Windows 10, it’s listed under Windows Accessories and therefore it’s listed under the “W” section of the Start menu. So, while it used to be near the top and easy to find, now it’s near the bottom of the Start menu and you might not have noticed it. So now, in Windows 10, it’s called “Windows Accessories” so it’s near the bottom. To get to Windows Accessories, you have to click the Windows 10 Start button, then scroll down to the W’s and find Windows Accessories.
Well, here, take a look:

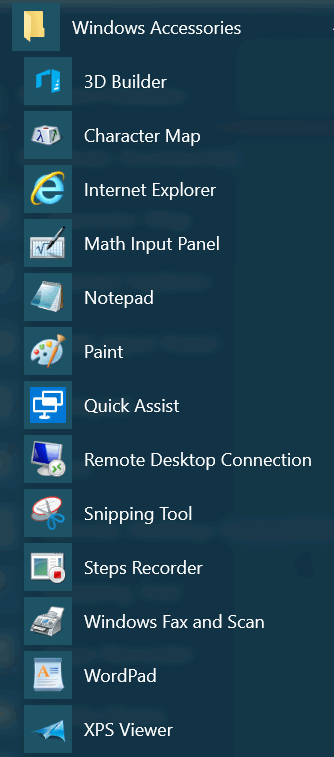
Hidden in the Windows Accessories menu is a bunch of useful stuff. Sorry for that extremely technical language 🙂 . When you click the down-arrow next to Windows Accessories (see above) you’ll see a menu open (see below):

As you can see (above) a lot of useful Windows programs are hiding in the Window Accessories menu – things like Character Map (which helps you make stuff like æ Ø ß ¿ – characters not normally available on your keyboard – well at least not on my keyboard. You’ll also find WordPad, Notepad, Sticky Notes, Snipping Tool, Internet Explorer and more.
And if anything in the Accessories menu is something you use often, you can make a shortcut on the Start menu or Taskbar. All you have to do is right-click the item you want to put on your Start menu or Taskbar and choose “Pin to Start” or click “More” and then “Pin to taskbar” (see below):


In this information helps you, please considering helping us continue our mission of helping you.


Hello, not sure if your able to help, I’ve recently removed my cdrom and installed a caddy with a second hard
drive, not sure when my problem started but I’m unable to change the size ( storage size ) of my recycle bin
on all the drives. I formatted the second drive which had been the original drive when I bought the lap top. Tried
the web and found no answer, what do you think?
Dave, you don’t say what operating system and we have no idea what you mean by “a caddy”. Please try to clarify your question. The standard Windows procedure for changing he storage capacity of the Recycle Bin is this: Right-click Recycle Bin, and then click Properties. Move the slider to increase or decrease the amount of disk space that is reserved for storing deleted items (recycle bin).
Thank you, thank you for this information. I didn’t know this existed. I’m 79 years old and I love to learn new things.
Shirley
Thank you so much for this information. I am 79 years old and I love learning new things especially things concerning my computer.
Shirley