Windows Check Boxes Make Selecting Files and Folders a Snap
Whether you want to select all files in a folder or select only a few, there is no easier way that using the Windows Check Box feature. Trouble is, it’s not turned on by default. But don’t worry – it’s super easy to turn on.
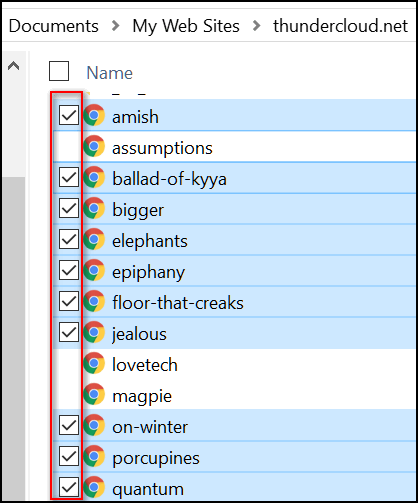
But first, if you don’t what check boxes are, we’ll show you. Here’s a list of our essays I keep in my Documents folder. I’ve selected some and not others to show you how easy it is to select files (and/or folders) with the check box feature turned on. In order to select certain files, rather than holding down the Ctrl key and selecting each file I want from a list of files, I just tick the check box. If I want all files/folders in a directory, I just tick the check box next to “Name” at the top and all files are selected.

There are two ways enable check boxes. The first way applies to Windows 8.1 and Windows 10:
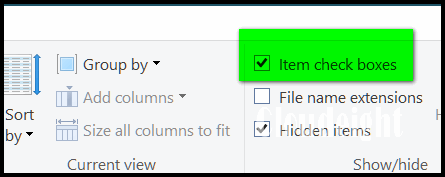
Press the Windows Key + E key to open File Explorer. Then click on “View” at the top. Now, tick the box next to “Item check boxes” and close the dialog (see below):

Here’s a closer view:

Here’s how you do it in Windows 7.
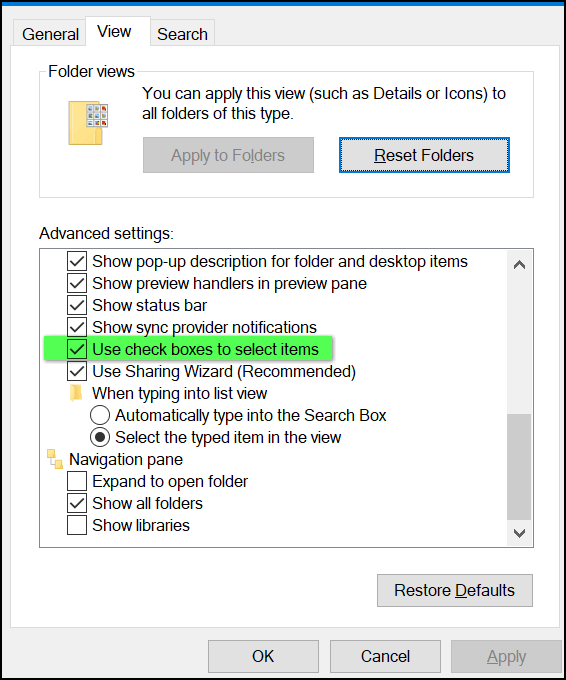
In Start Menu search type Folder Options in the search box. In the Folder Options window, click the View tab at the top, and scroll down way down and tick the box next to “Use check boxes to select items” then click Apply / OK.

You can use the Windows 7 method of turning on Check Boxes in Windows 10 too. Just search for Folder Option in the Taskbar search. Then click on “File Explorer Options” when it appears at the top and follow the instructions for Windows 7.


Thank you for all your tips! I save almost all of them in a folder.
Thank you Karen. Happy New Year to you and your loved ones!