Use Your Voice to Control Your Windows 10 Computer
Did you know you can do almost anything on your Windows 10 computer just by using your voice? You can open programs, control settings, dictate emails, use Notepad to take notes – in fact, almost anything you can do with a keyboard & and mouse or touchpad you can do using your voice. Windows 10 calls this feature Speech Recognition. Here’s how to turn it on and set it up.
Hold down the Windows Key and press the CTRL and S keys [Windows key+Ctrl+S]. And if you do that right you’ll see “Welcome to Speech Recognition” appear. This starts the Speech Recognition “setup wizard”.
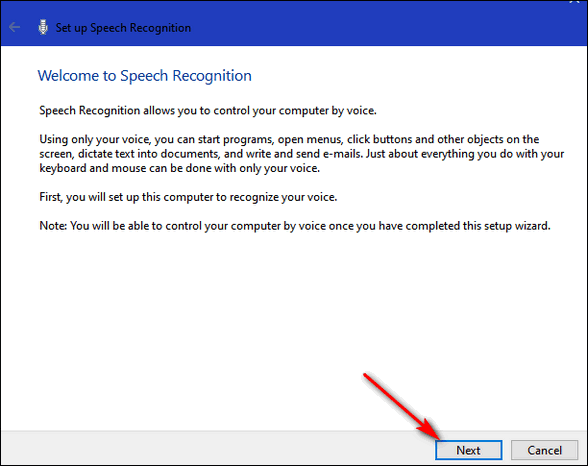
Read the information in the dialog and click “Next” to start the Speech Recognition setup wizard.
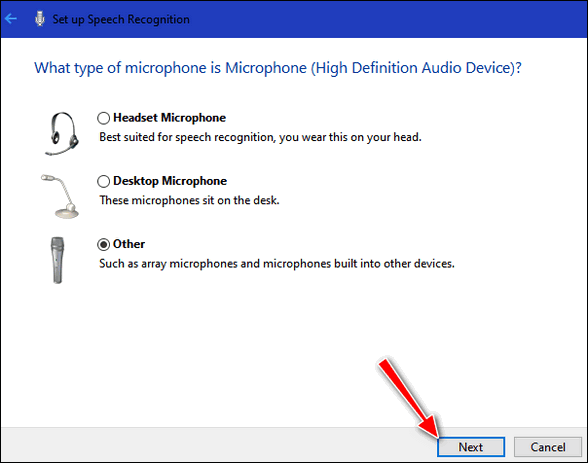
Choose the type of microphone you use and click “Next” to continue.
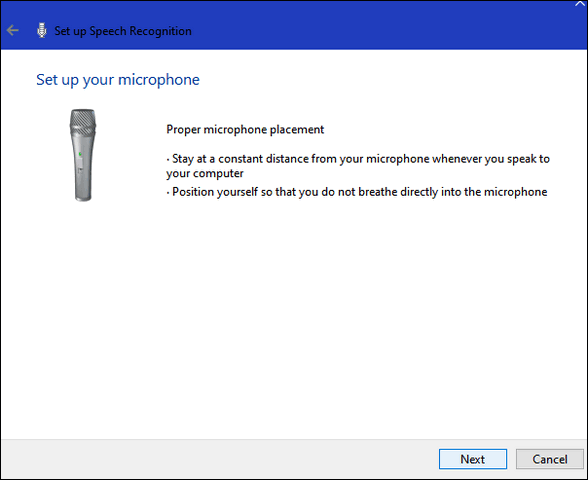
Read the information in the window and then click “Next”.
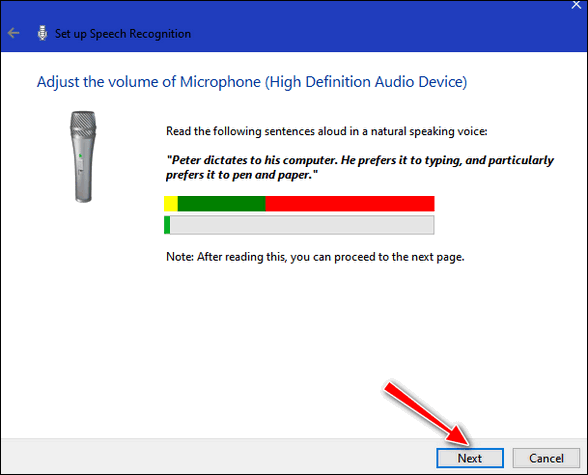
Read the text in the dialog aloud into your computer’s microphone… speak in your natural speaking voice.
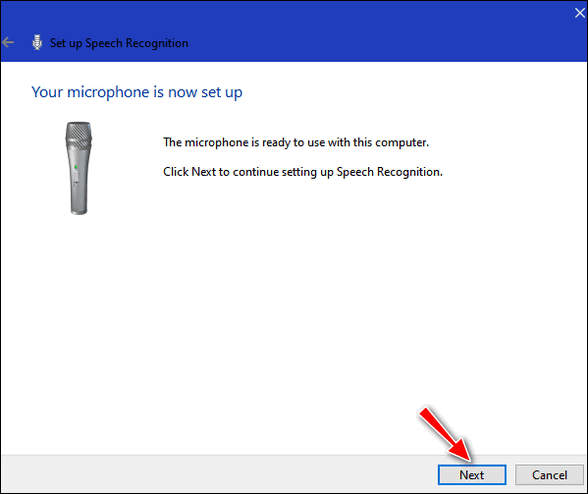
If you did everything correctly, you’ll see a window appear telling you that your microphone is now set up. Click “Next” to continue.
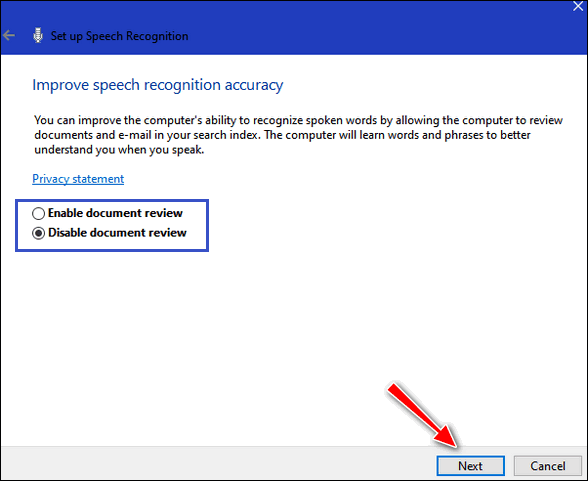
If you feel comfortable allowing Windows to “review” documents and emails on your computer, it can help improve the Speech Recognition feature by learning words and phrases you use most often. Comfortable with that? Tuck “Enable document review”. If you’re not comfortable with it, tick “Disable document review”. Once you’ve done one or the other, click “Next”.
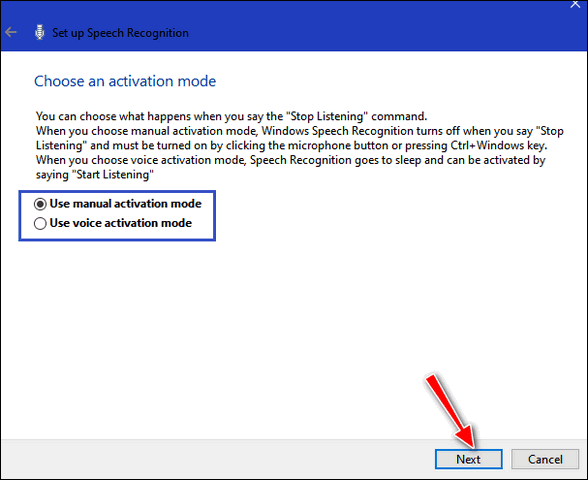
Choose your activation mode based on the information in the dialog. I prefer to turn Speech Recognition on and off manually. You may want to activate it with your voice. Your voice – your choice, I tells ya.
After you’ve made your choice, click “Next”.
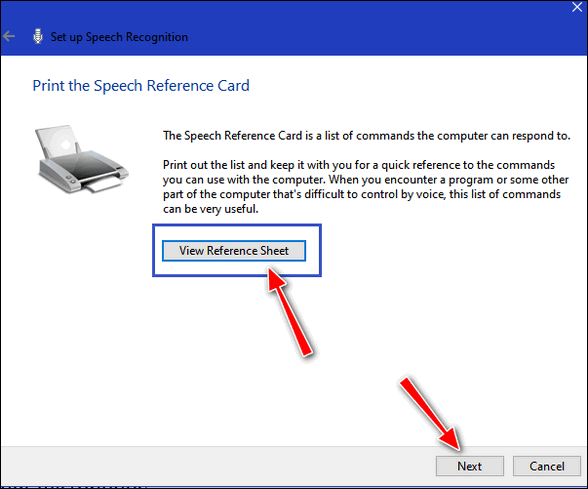
You can print out a quick reference command sheet by clicking on the “View Reference Sheet” button. If you want to see the quick reference sheet, you’ll find it here. It would be a good idea to print it if you plan on using the Speech Recognition feature.
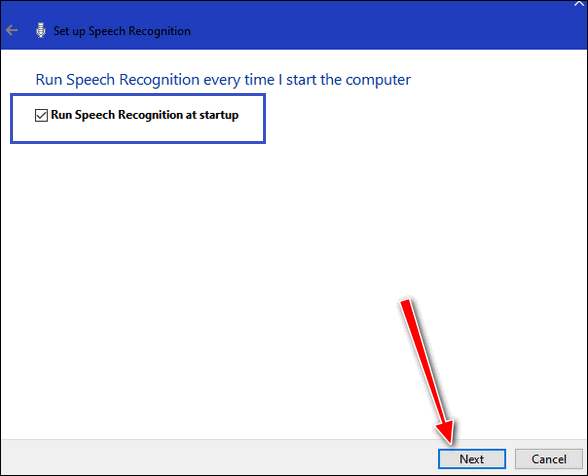
Next. Do you want to run Speech Recognition when Windows starts? If you plan on using it often, you might want to leave the box next to “Run Speech Recognition” at startup” checked, if not, uncheck the box
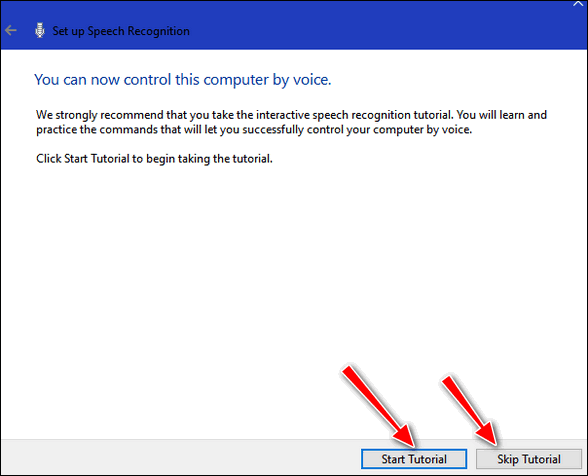
Speech Recognition is set up. If you plan on using it often, it would be a good idea to click “Start Tutorial”. If you want to preview the tutorial without setting up Speech Recognition, click here.

With Speech Recognition turned on, I can open Google Chrome by saying “Open Chrome”.

Above I opened Notepad by saying “Open Notepad”.


When Speech Recognition is turned on you’ll see Speech Recognition on your desktop. When it’s turned on the circle around the microphone icon is blue and it says “Listening” in the text bar. When it’s turned off, the circle is gray and the word “Off” shows in the bar.

You can drag the Speech Recognition interface around on your screen to get it out of the way. And you can close the app by clicking on the “x” the top-right corner.

After several tries I finally got Speedc Recognition working well enough to dictate the above into a Notepad file. What I really said was “Done with Windows Speech Recognition” but it looks like Speech Recognition has a self-image problem.
On a more serious note, I can see where Speech Recognition could be a blessing to those who are physically challenged or who suffer from arthritic pain or other maladies that make using a mouse/touchpad and/or keyboard difficult
Me? I’m just lazy. I think I might use Speech Recognition occasionally.
Words to the wise…
Make sure you turn Speech Recognition off when not using it, it negatively affects typing.
Print out the quick reference sheet…you’ll need it.
Take some time for the tutorial. It will help you a great deal.


Thank you for this set up information. Question Please. Can I control the Thunderbird emailer using Windows Voice Control? Do all the regular stuff like read the emails, respond to an email, delete emails etc.
I don’t use Thunderbird so I can’t tell you. Did you try it?