Make Your Windows 10 Start Menu More Like the Classic Windows Start Menu
We notice that some users still don’t like the Windows 10 Start menu and would rather have a Start menu more like the Start menu in older versions of Windows. And some of you don’t like the Start menu covering half your screen when you open it. But you can customize the Windows 10 Start menu to make it just the way you want it.
Here’s how to customize and trim down the Windows 10 Start menu so it’s more like the classic Start menus in previous versions of Windows – that is – just a list of apps and desktop programs.
Let’s get started.
Most Windows 10 Start menus look like the one below.
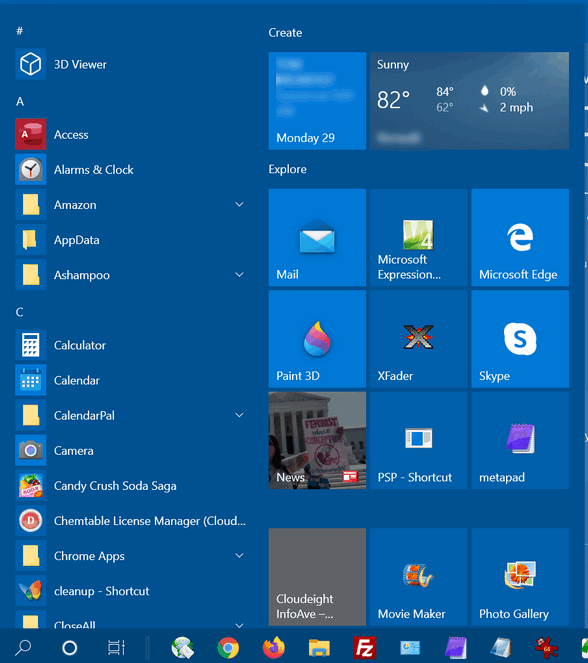
But you can customize it and make it look much more like the classic Start menus from older versions of Windows. Best of all, it’s easy to do.
1.) Grab a tile, any tile, and right-click on it. Then choose “Unpin from Start” from the popup menu. Don’t worry, removing a tile does not remove the associated app.
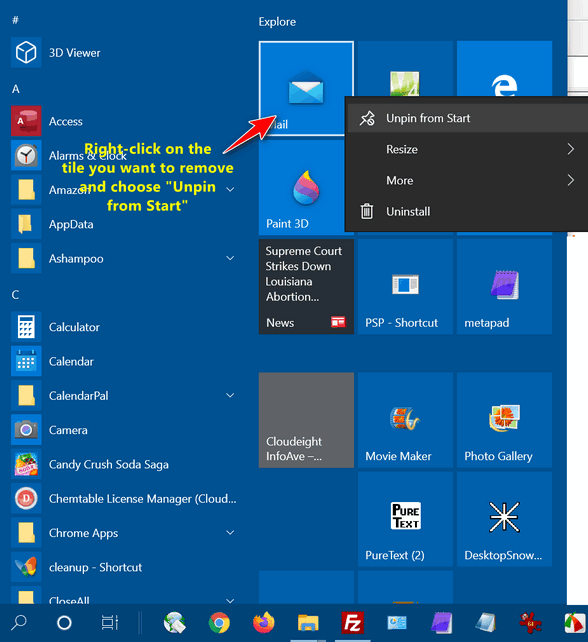
2.) Remove all the tiles one at a time.
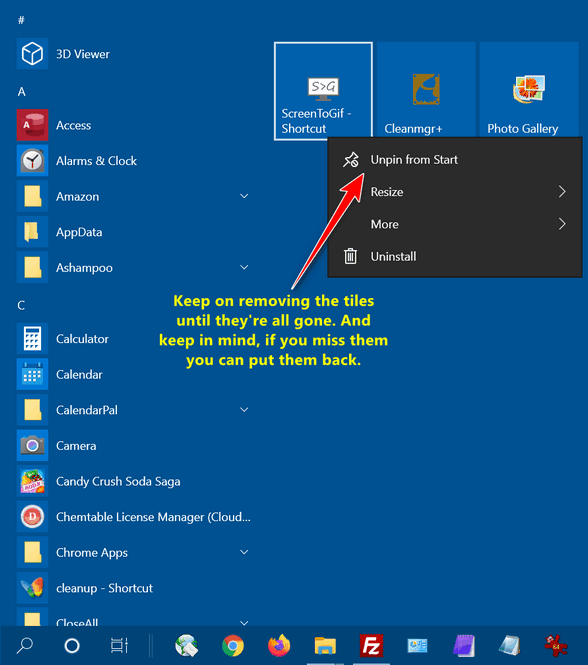
3.) When you’re done removing all the tiles, it’s time to resize the Start menu. To do that, just hover your cursor over the right edge of the Start menu until you see the pointer turn into a double-arrow icon. When you see it, drag the edge of the menu inward.
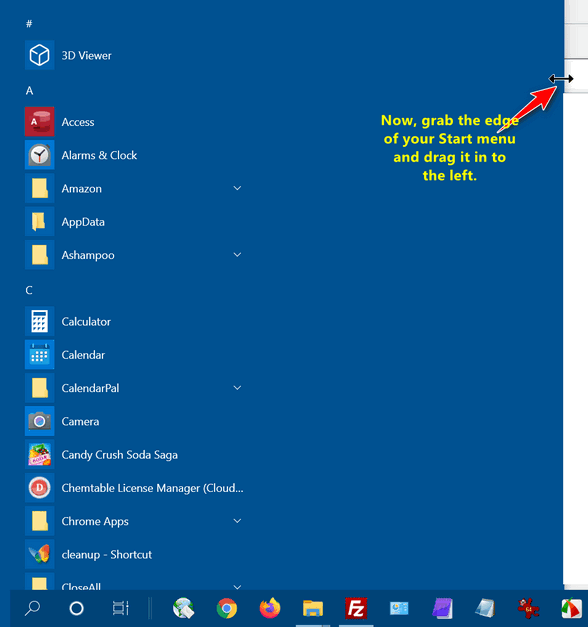
And if you like you can make your “new” Start menu shorter by dragging the top edge downward.
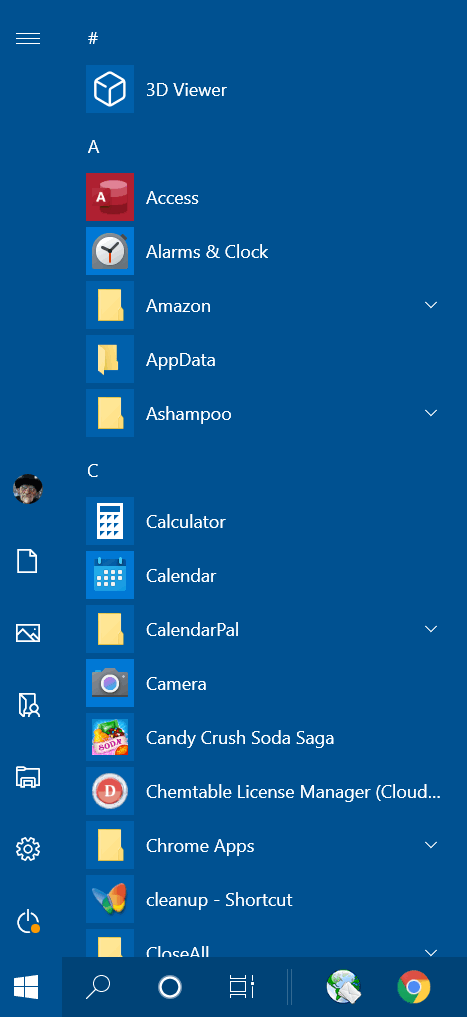
4.) You can see below that your “new” slimmed-down Windows 10 Start menu is just a list of apps and desktop programs, more like the classic Windows Start menus from previous versions of Windows.
And you’ll see have the convenient icons for folders, Settings, etc. on the left edge of the start menu.
But what if you want your tiles back?
If ever you should want your tiles back it’s easy to do. Just find the program or app in the menu you want to create a tile for, right-click on it, and choose “Pin to Start”. Once you’ve pinned it, you can resize the tile by right-clicking on it and choosing the size you want.
That’s it. Go customize! Go Classic.

