How to Make a Video from Your Photos Using the Windows 10 or Windows 11 Photos App
We receive quite a few asking how to make videos from pictures. So, we took some time to play around with the Photos App. The Windows Photos App has quite of few features, but they’re certainly not obvious or easy to find. So, here are some basics to get you started. After you learn the basics, let your creativity rule!
Using the Windows 11 Photos App to make a video
Let’s make a video from your photos – it’s quite easy to do.
Open the Photos app from the Windows 11 Start menu or type Photos in the taskbar/Start menu search and press Enter to open it.
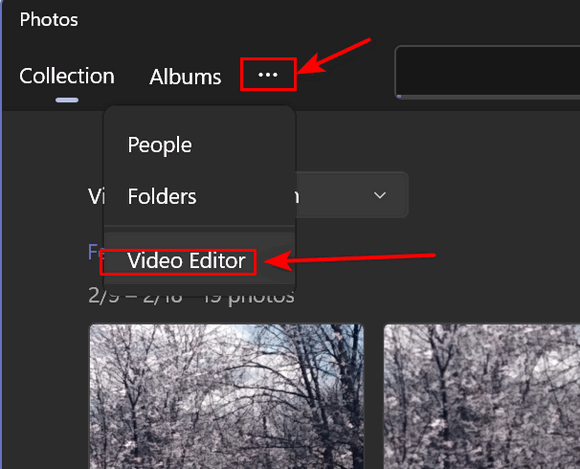
At the top of the Photos app, you’ll see three dots. Click on the dots and Video Editor will appear in a drop-down menu. Click on Video Editor.
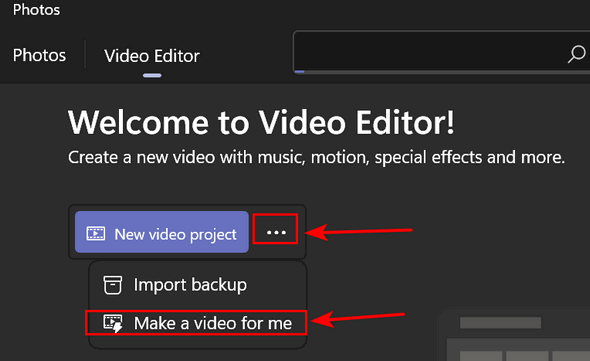
Click the three dots next to “New video project”, then click “Make a video for me”.
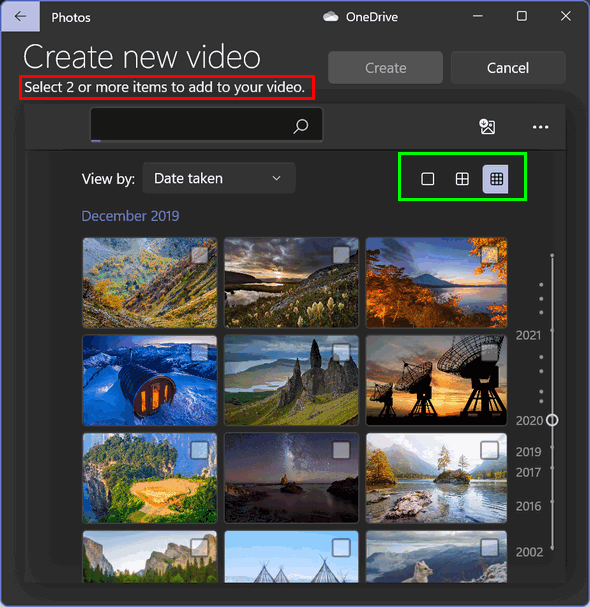
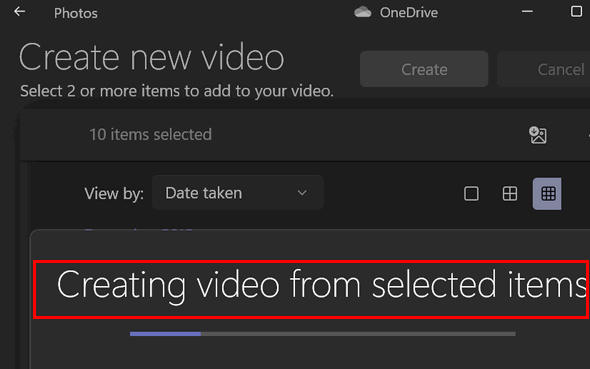
Time to add some pictures to your video. You can browse your pictures by date taken or “Recently added” Add pictures to your video project by clicking the box in the upper-right corner of your photos. When you have all the images you want to add to the video selected, click “Create”. Note that you can change the view to show more or fewer images by clicking the icons that look like boxes outlined in green below.
Then give your video a title and click OK.
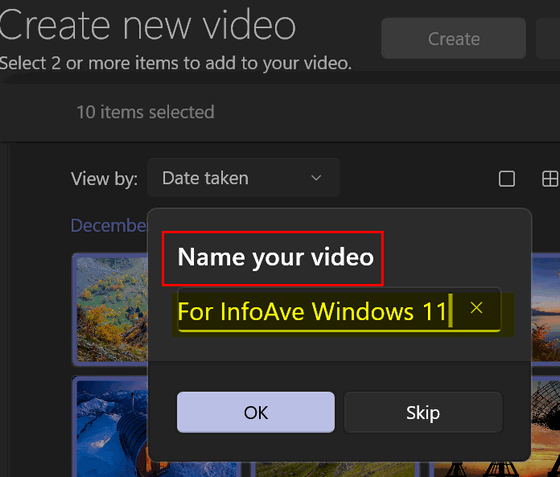
Click OK and Windows will create your video and even add music that it “thinks” fits the video. Don’t worry, you can change the music, add audio, make a title picture, change the order of the photos, add special effects, text, filters, and more later.
Once the Windows 11 Photos app compiles your video, you can start using your creativity to make it yours. You can drag images around to change the order of the images, you can add text, 3D effects, Filters, Motion, and even change how long the image appears in the video by clicking “Duration”. Click on the blue “Edit video” to use your creativity to make your video truly yours!
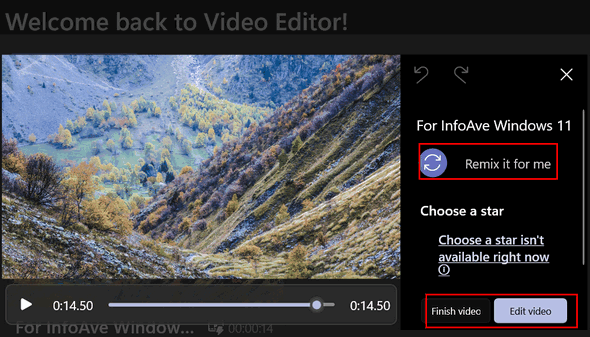
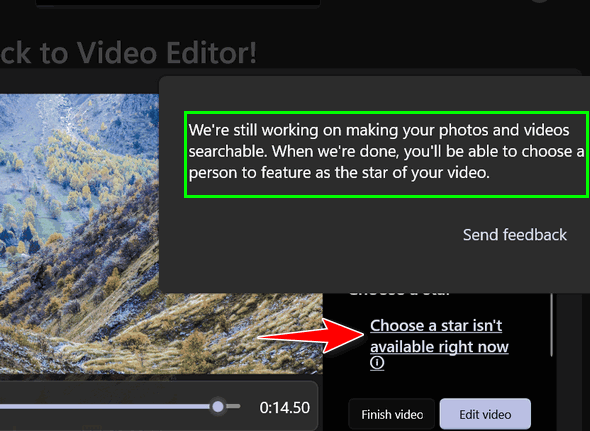
You’ll notice an option called “Choose a star” which was not available yet when we made this tutorial. Microsoft says they’re still working on this feature.
All of the options are easy to use. You’ll have several text styles to choose from, and the Windows Photo app will do its best to make it fit the image. It’s really easy. If you want to add background music or background audio effects like squawking birds, waterfalls, street noise, etc. Your creativity is your only limit.
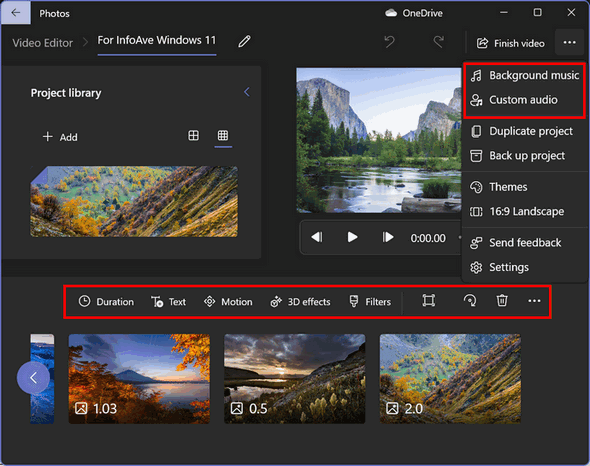
Adding special effects is easy too. You can add filters, motion, text, change the duration, and more. For instance, click on 3D effects and choose the effect you want – there are quite a few to choose from – and you’ll get a preview of what each effect will look like on the image.
When you have your video just the way you want it, choose the video quality (1080p is recommended), click “Export” and choose where you want to save your video.

The default (and only) file format the Windows Photos app saves videos in is MP4. You can convert MP4 videos into other formats using one of the many online video conversion sites.
And that’s about it. Those are just the basics of using the Windows 11 Photos app to create videos from your photos and music. This tutorial should be enough to help you get started making your own video masterpiece.
We made a quick video for you. We let Windows edit it. We did this only to show how easy it is to make a video from your pictures using the Windows 11 Photos app. It took us about 2 minutes to do. You can view it here.
Remember, you can control how long each photo is shown, you can select effects for each photo, add text, 3D effects, motion, and more to each image in the video. You can make a very professional video if you want to take the time to do it. The tools are there at your fingertips with the Windows 11 Photos app.
Now go and create videos using Windows 11 Photos app and share them with your family, friends, or share with everyone on social media.


Hi Darcy & TC,
Thank you for all the great work you do on our behalf.
I just tried your videos info, but when finished, my pictures were all pixelated, however, if I did the same video in MovieMaker, they were fine. Have you come across this problem, and /or have any possible solutions
Thanks
I don’t know what to tell you. Neither the video we created on Windows 10 or the one we created on Windows 11 was pixelated – you can see for yourself by looking at our test video here.