Another Way to Clean Up Your Windows 10 or Windows 11 PC
There are dozens of free and paid programs that you can download to clean up your Windows computer. Windows even comes with Disk Cleanup which was supposed to be deprecated by Microsoft some time ago but wasn’t – at least not yet. Of course, then there are PrivAzer and BleachBit as well as the popular (but not popular with us), CCleaner – which we most strongly do not recommend.
Somewhere, along the way, Windows Storage Sense has been forgotten. So, we’re going to remind you about the benefits of Windows Storage Sense. We’ll cover Storage Sense in Windows 10 and the more streamlined Storage Sense in Windows 11.
Windows 10 Storage Sense
Right-click the Start button and choose Settings. In Settings choose System > Storage.
If you have not done so already, turn on Storage Sense by sliding the switch to the “On” position.
If you want to run a quick cleanup, click “Configure Storage Sense or run it now”.
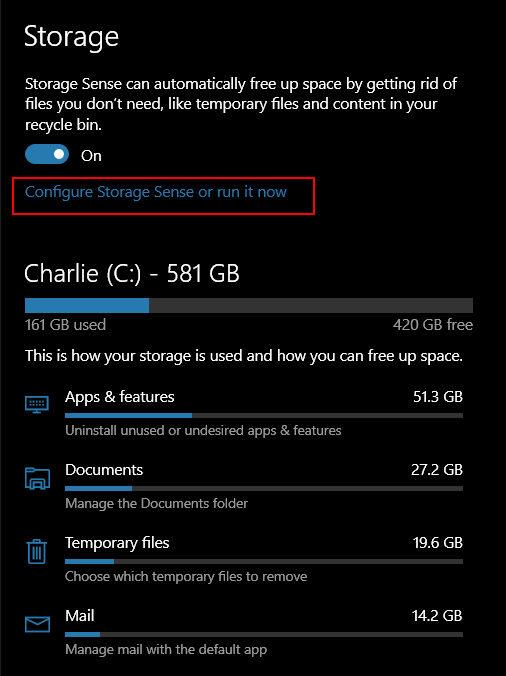
Under “Temporary Files” make sure you check the selection box next to “Delete temporary files my apps aren’t using”. And then check to make sure you have “Never” selected under “Delete files in my downloads folder if they haven’t been open for more than:”. You can easily clean up your Downloads folder manually.
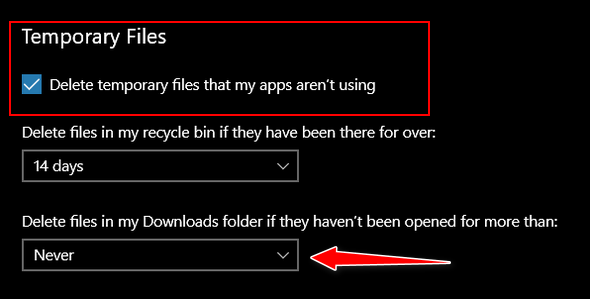
Next, under “Free up space now”, click the “Clean now” button.
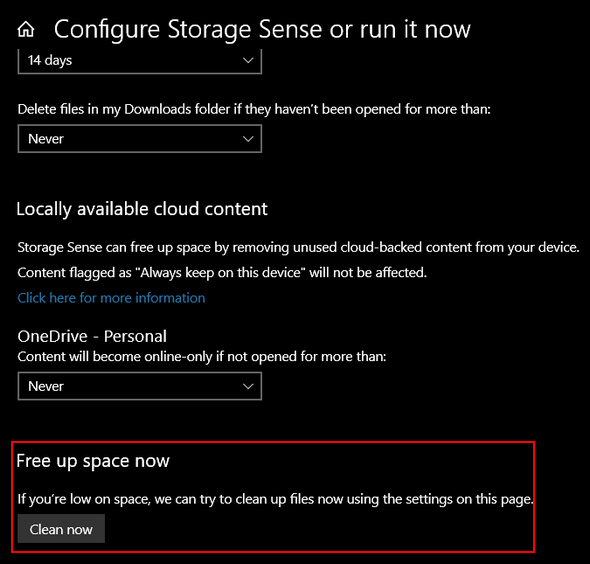
That’s all there to using Storage Sense in a basic cleanup. If you’re an advanced user and like to tinker with settings, you can fine-tune Storage Sense and customize it to your liking.
Windows 11 Storage Sense
Right-click the Start button and choose Settings from the menu. Then click on System > Storage. Yep! Just like Windows 10.
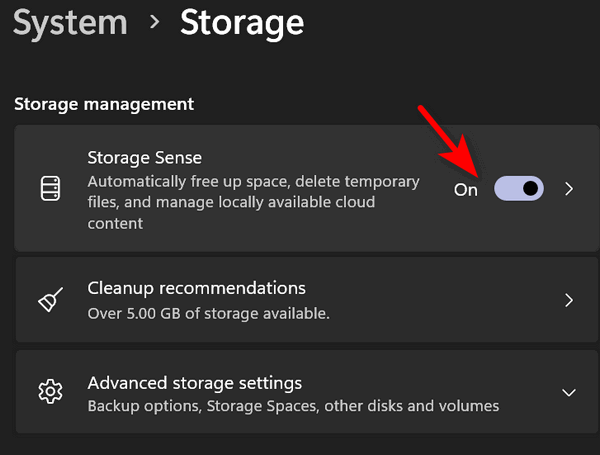
When Storage opens, click on “Storage Sense”…
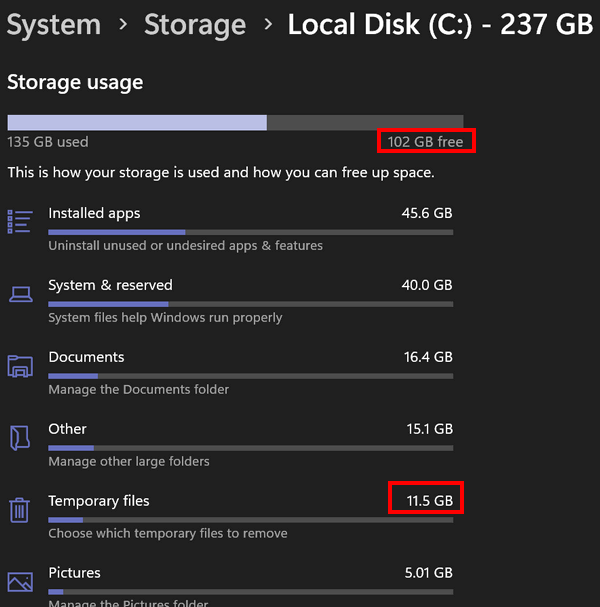
In the System > Storage > Storage Sense section, turn the switch to the “On” position under “Automatic user content cleanup”.
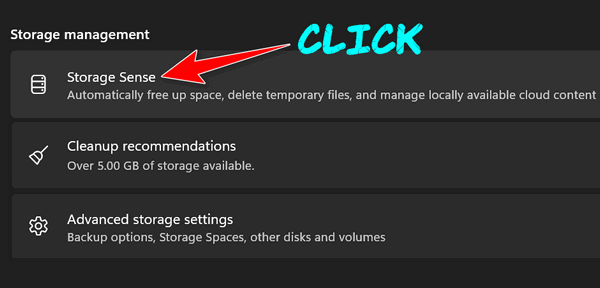
Next, scroll down and click “Storage Sense”…
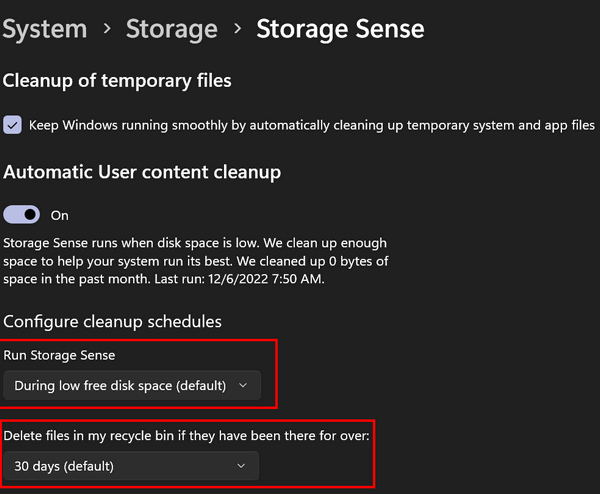
We recommend that you change the settings for “Run storage sense” and “Delete files in my recycle bin…” as follows…
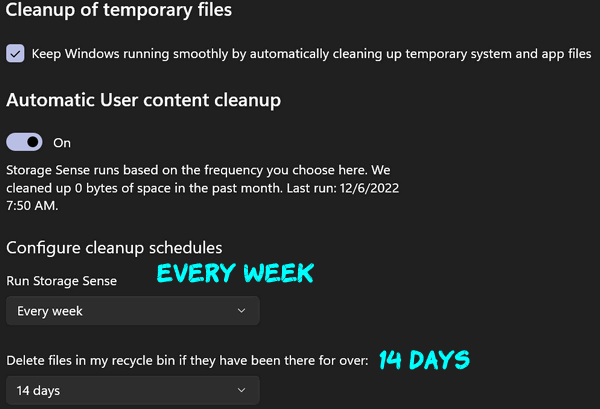
“Every week” and “14 days” respectively
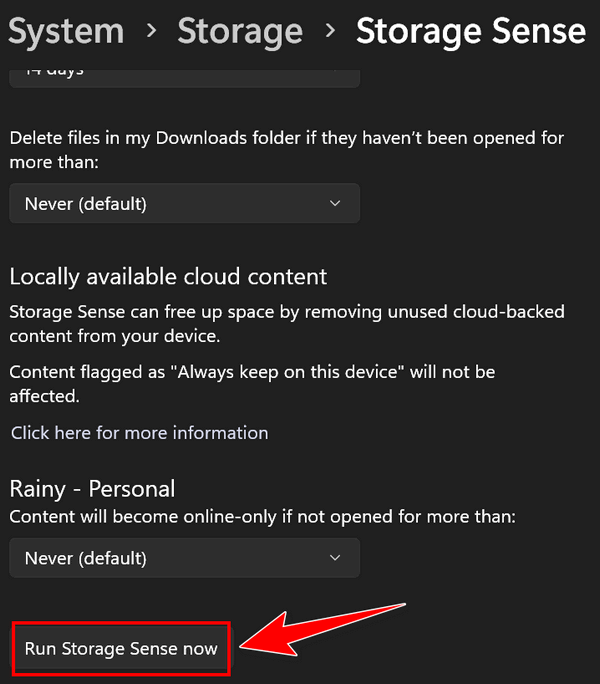
And once you get Storage Sense customized so it runs every week and automatically cleans up your recycle bin every 14 days, you can go ahead and run it now. Just scroll down and click on “Run Storage Sense now”.
And if you want to do some fine-tuning…
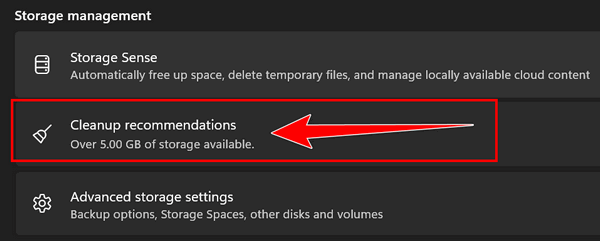
Storage Sense in Windows 11 allows users to fine-tune and customize Storage Sense cleanup settings. To access these settings, go back to System > Storage > Storage Sense and click on “Cleanup recommendations”…
Windows 11 will also let you know which files are safe to clean.
Now you know another way to clean up your Windows 10 or Windows 11 PC.


A long forgotten tip. In my case one I didn’t even know about until recently. Thanks to TC I’ve now got Storage Sense all set up. Makes sense, right!?
I have been using ccleaner for a long time and I have had no problems with it.
You just have to read carefully options before accepting