Windows Clipboard History: Turn It On to Access Many Useful Features
Note: This article was written for Windows 11. But if you’re using Windows 10, don’t worry! We have you covered too. See our article here to learn how to turn on Clipboard History and what you can do with it in Windows 10.
Windows 11 Clipboard History
Windows 11 Clipboard history has been greatly improved since Clipboard History was introduced in Windows 10.
As with Windows 10, before you can use Clipboard History, you’ll need to turn it on.
Turn on Clipboard history” in Windows 11
Type CLIPBOARD in the Taskbar/Start menu search and click “Open” when you see Clipboard settings appear in the search results. Or just press “Enter”. You can also open Clipboard settings from the Settings menu. Open Settings > System > Clipboard.
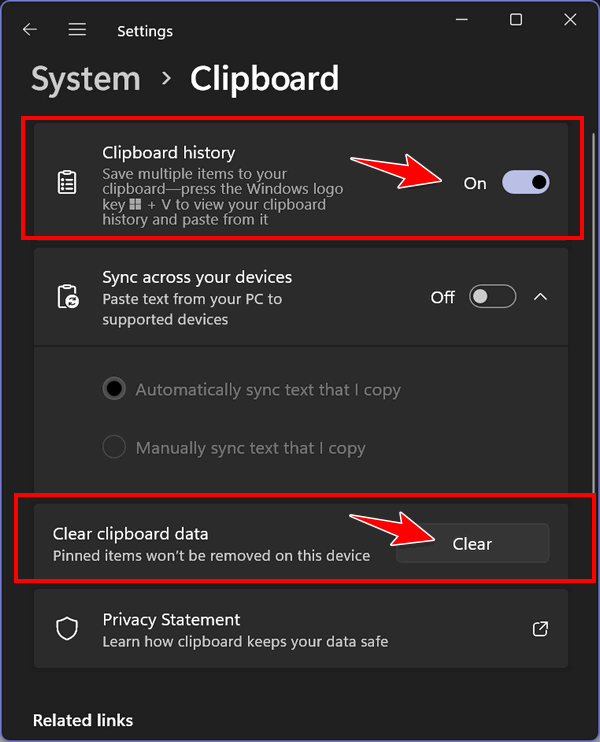
When “Clipboard settings” opens, turn the switch next to Clipboard history “On”. If you log into other devices with the same Microsoft account you can also synchronize Clipboard history across all your devices by turning the switch next to “Sync across your devices” to the “On” position. You can fine-tune the “Sync across your devices” option by automatically or manually syncing the text you copy.
Finally, before we show you ways you can use Windows 11 Clipboard history, you should know you can clear your Clipboard history here or directly from the Clipboard history app. See the “Clear” button in the screenshot above.
Using Clipboard History in Windows 11
Once you’ve turned Clipboard history on, everything you copy will be placed on the Clipboard. To access your “Clips” just press the Windows key + V. That’s it. To paste a “Clip” just click on the Clip.

You can also delete individual Clips by clicking on them and clicking on the garbage can icon. Or clear all your Clips by clicking on the “Clear all” button.
Other cool things you can do with Windows 11 Clipboard History.
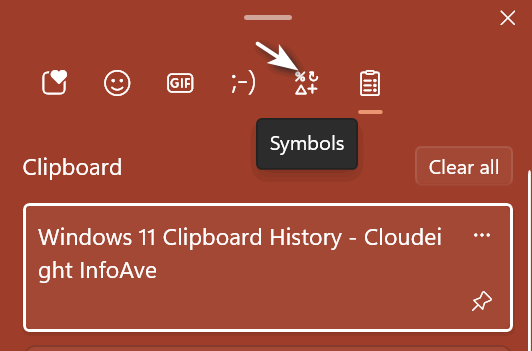
You easily access symbols of all kinds, right from Clipboard history. And they’re broken down into categories: General punctuation, Currency symbols, Latin symbols, Geometric symbols, Math symbols, Supplemental symbols, and Language Symbols.
To access all symbols, press the Windows key + v to open Clipboard history and click on the Symbols icon at the top.
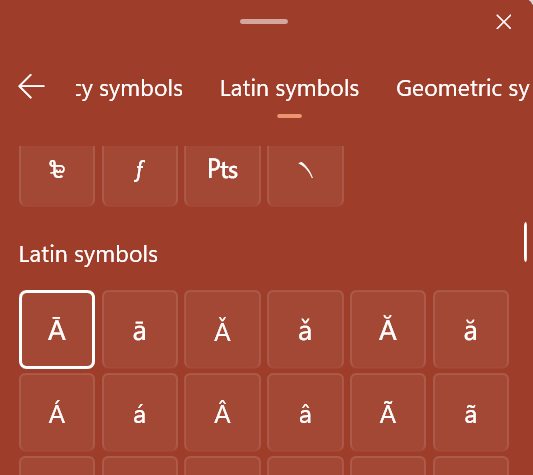
See? © ℉ § ¥ № ℗ » « ⟦ % ‱ ⁂ ✓ ¿
Do you like plain or fancy text emoticons? Windows 11 Clipboard history has you covered. Just click on the text smiley at the top.
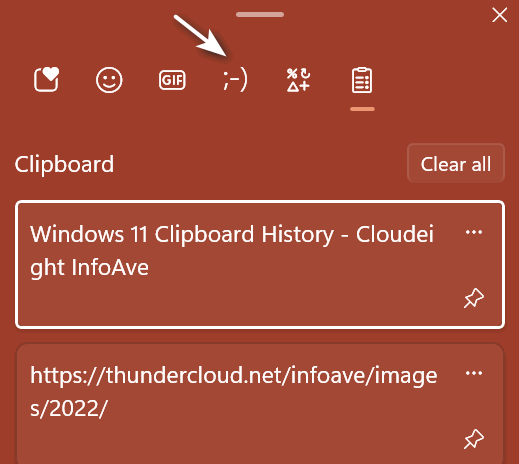
From 🙂 to 🙂 to 😉 to these… (❁´◡`❁) (●’◡’●) ╰(*°▽°*)╯ Windows 11 Clipboard history has you more than covered.
And wait there are more…
Windows Clipboard history also lets you access GIFS…

And tons of emoticons like these…

If you want to access GIFS and Emoticons Windows 11 in Clipboard history they are right there at the top… see?
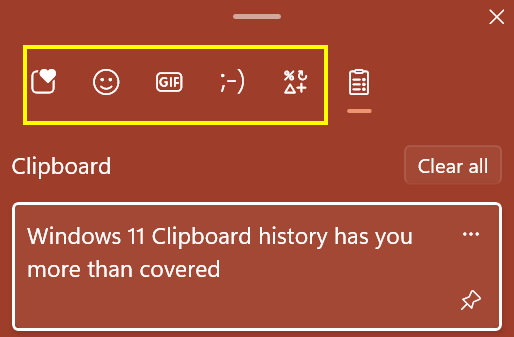
Remember, once you turn on Windows 11 Clipboard history, all you need to do to access it is to use the Windows key + v shortcut!
Make a small donation and help us help you!
If you don’t need any of our products or services right now, please help us with a donation. Even the smallest gift is appreciated. Every donation helps us to provide useful information that helps you with your computer as well as helping to keep you safe on the Internet. We offer free help to thousands of people every year… and we offer an honest and inexpensive computer repair service too. We do everything we can to help you with your computer and keep you safe too.
So if you don’t need any of our products or services right now, please help us by donating right now. Thank you!
Interested in making an automatic monthly gift?
Visit this page. Help us keep helping you… and help us keep you stay safe on the Web.


