How to Manage and Pause Updates in Windows 10 and 11
Both Windows 10 and 11 allow you to manage Windows updates by scheduling updates or pausing updates. The screenshots in this article are from Windows 11, but Windows 10 has the same settings options.
Scheduling Updates
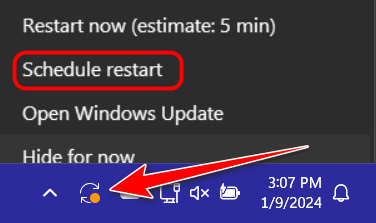
When Windows updates are available and a restart is required to install them, you’ll see the “Update Restart” icon in the taskbar. It looks like this:

If you click on the Windows update restart icon, you can schedule the restart for a time and day that works for you. Updates can be rescheduled anytime within 7 days from the time you click the Update Restart icon. You can also schedule the time for which you want to schedule the restart.
Did you know that you can pause updates for up to five weeks?
Did you know that you can pause updates for up to five weeks? If you’ve had problems with Windows Updates in the past and you don’t want to be among the first to get Windows Update, this option is for you.
Type PAUSE UPDATES in the taskbar search and press Enter when you see “Pause Updates” appear in the search results.
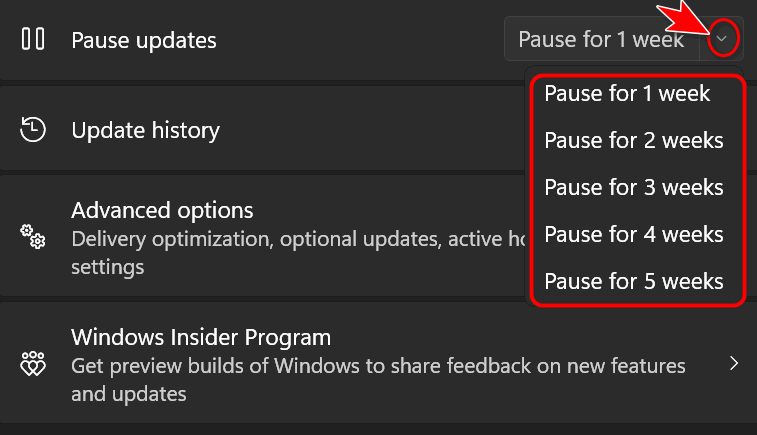
When the Windows Update page opens, look for “Pause updates” … next to “Pause for 1 week” you’ll see a small down arrow. When you click that arrow you’ll see options to:
Pause for 1 week
Pause for 2 weeks
Pause for 3 weeks
Pause for 4 weeks
Pause for 5 weeks

You can only pause updates for up to 5 weeks. Once the 5 weeks are over, the updates will be installed. In other words, you can’t pause updates for another 5 weeks. But we hope that five weeks would be enough time for Microsoft to fix any faulty updates, right?

