File Explorer’s Tiny Buttons
First. a big thanks to Ron E. for suggesting this tip. It’s something that very few people know is there, but it’s something almost everyone will want to use.
Here’s Ron’s tip:
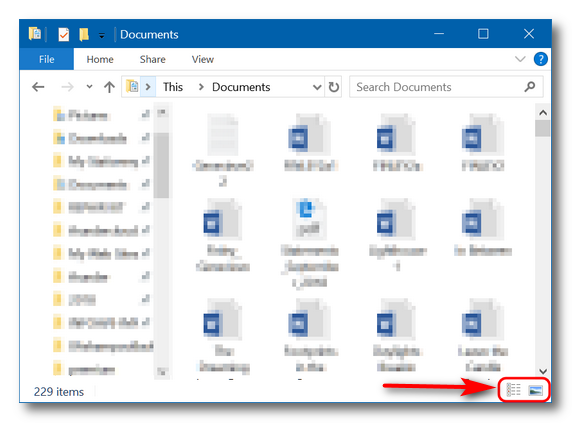
You can change the content look of your folder from lists to icons. In the lower right hand corner of your open folder, there are 2 very small boxes. Click the right one and you get to see the content in icons. Clicking one the left one converts it back to lists. It is a way of breaking up the boredom of searching through lists. ( They are not called icons but I forgot what they are called.)
We don’t know what the official name is either, Ron. When Microsoft uses the word “Dehydration” to describe the process of deleting local copies of files in One Drive, that gives us a lot of latitude. So, our new official name for them is: File Explorer’s tiny buttons.
They’re tiny – almost unnoticeable – but they can change the look of your folder content from List view to Large icon view and back with just a click.
Here, we’ll show you. Open File Explorer (Windows Key + E) and follow along with us.
Above… there they are – File Explorer’s tiny buttons.

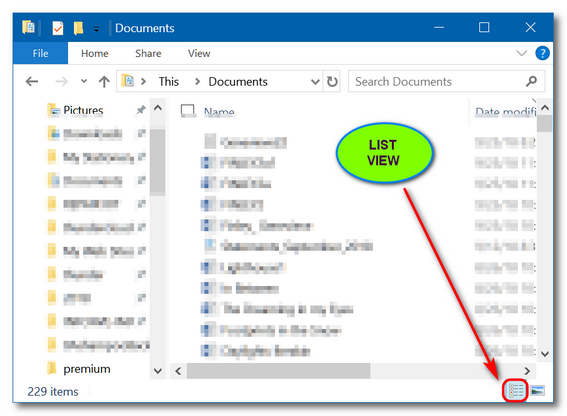
Above: Clicking on the tiny button on the left, change the File Explorer view to “List (details)” view.
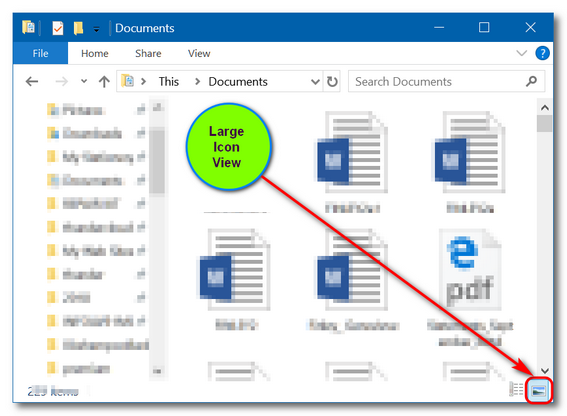
And below, you can see that clicking on the tiny button on the right changes the File Explorer view to “Large icon” view. See?

Now anytime you’re viewing files and folders in File Explorer, you can use File Explorer’s tiny buttons to switch back and forth between List view and Large Icon view.
We never knew tiny buttons could do such big things.
Thanks Ron. Great tip!


You can also use CNTL-SHIFT combinations for those and more viewing options.
CNTL-SHFT 1 = Extra Large Icons
CNTL-SHFT 2 = Large Icons
CNTL-SHFT 3 = Medium Icons
CNTL-SHFT 4 = Small Icons
CNTL-SHFT 5 = List
CNTL-SHFT 6 = Details
Excellent… A great addition to this tip. Thanks! And you can also use the mouse wheel while holding down the CTRL key to incrementally go from list to extra large icons and everything in between.
They are called thumbnails; great tip!
Thumbnails are usually smaller sized images, not buttons. But if Microsoft can use Dehydrate you can call them what you like.
Shoot! Here I was using that “View” tool at the top.
To me the left button is not List, it is Details view.
Maybe on your computer but not on any Windows 10 computer I’ve ever seen.