How to Create a System Restore Point Shortcut
This tip works in Windows 10 and Windows 11. The screenshots in this article are from Windows 11 but it works exactly the same in Windows 10. We’re hoping to show that Windows 10 and Windows 11 are kissing cousins. If you can use Windows 10, you won’t have much trouble learning Windows 11.
Creating Windows System Restore Points is a multi-step task. But did you know you can create a System Restore Point with a single click? It’s easy to do, and it works with Windows 10 and Windows 11.
Here’s how to do it.
1. Right-click on your desktop
2. Choose “New” > “Shortcut”
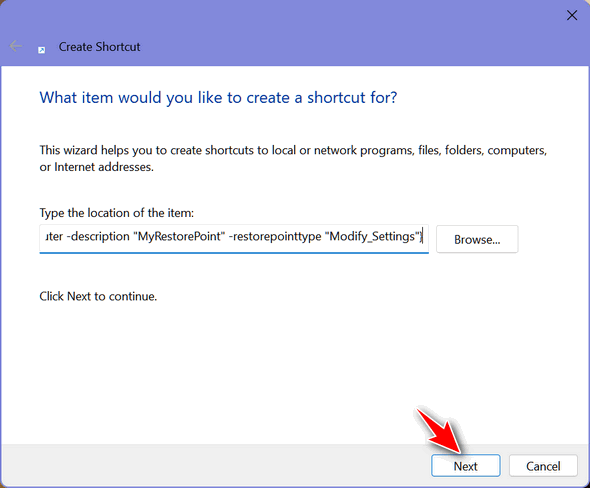
3. In the box under “What would you like to create a shortcut for” copy & paste this line:
powershell.exe -NoExit -Command "& {Checkpoint-Computer -description "MyRestorePoint" -restorepointtype "Modify_Settings"}

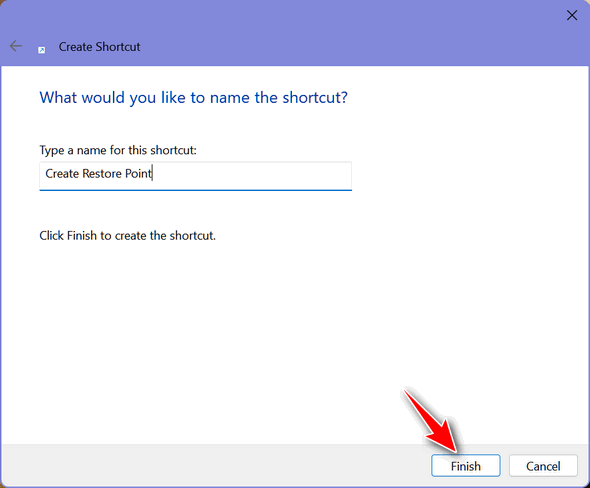
4. Now give it a name, for instance, “Create Restore Point” would be nice.


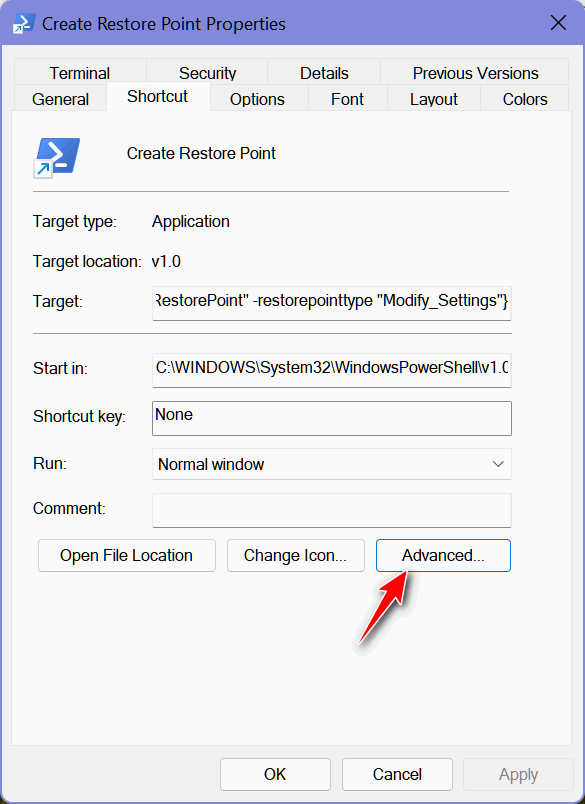
5. Right-click on your desktop shortcut and choose “Properties”. Click “Advanced”.

In the window that opens, tick the box that says, “Run as administrator”. Then click OK. Click Apply/Ok (Windows 10) or “OK” (Windows 11).

Now when you click your new shortcut, you’ll see this:

Now you can create a System Restore point with just a single click!
For more interesting reading about System Restore and how to use it, see these Cloudeight articles:
This article shows you how to use System Restore.
And this one shows you how to adjust the space allocated for System Restore to use.


Brilliant – as always!
Hi, I did what you suggested re Restore Point. At least I think I did because it didn’t work. I tried it the second time with the same result. When I click on the new Restore Point shortcut I just get a Power Shell page?????? I recall doing this one other time and I believe it worked then.
Dennis Hayden once more. I did it the third time and it still didn’t work. I can’t figure out what I am doing wrong. I took a picture of the power shell page I get but I can’t download it to you.
I tried it too, and got the same results as you.
Make sure you’re copying the entire command
powershell.exe -NoExit -Command "& {Checkpoint-Computer -description "MyRestorePoint" -restorepointtype "Modify_Settings"}Paste it into a notepad file and make sure you’ve copied it all. Then copy it into an ADMIN Command Prompt (instead of PowerShell).
All the screenshots in the article were taken on my computers yesterday. The tip was tested on 2 Windows 10 and one Windows 11 PC on 6 OCTOBER 2021.
Would only work for me in Windows 10 if I inserted %windir%\system32\rstrui.exe into the location box. Found that direction elsewhere. %windir%\system32\rstrui.exe
%windir%\system32\rstrui.exe only opens System Restore, it has nothing to do with creating restore points. You can do the same thing by opening a run box and typing RSTRUI and clicking OK.
As far as our instructions go…
Make sure you’re copying the entire command
powershell.exe -NoExit -Command "& {Checkpoint-Computer -description "MyRestorePoint" -restorepointtype "Modify_Settings"}The command %windir%\system32\rstrui.exe merely opens System Restore it does not open the Create a Restore Point dialog.
Paste it into a notepad file and make sure you’ve copied it all. Then copy it into an ADMIN Command Prompt (instead of PowerShell).
All the screenshots in the article were taken on my computers yesterday. The tip was tested on 2 Windows 10 and one Windows 11 PC on 6 OCTOBER 2021.
No, I take that back. It wouldn’t make a restore point, rather opened System Restore. Phooey.
I answered your other post. RSTRUI is the command to open System Restore.
get a message missing “. error something missing in the copy and paste part
Make sure you’re copying the entire command
powershell.exe -NoExit -Command "& {Checkpoint-Computer -description "MyRestorePoint" -restorepointtype "Modify_Settings"}Paste it into a notepad file and make sure you’ve copied it all. Then copy it into an ADMIN Command Prompt (instead of PowerShell).
All the screenshots in the article were taken on my computers yesterday. The tip was tested on 2 Windows 10 and one Windows 11 PC on 6 OCTOBER 2021.
I did this, I copied it from Notepad and put it into Command Prompt {Admin} but all I got was a new restore point, not a short cut. Please don’t be concerned as it obviously worked for some and not for others. It must be something to do with differences in pc’s or ??
As i said previously, I believe you gave instructions some time back for the same thing and if I remember correctly it worked.
Windows 10, not working for me either
It worked perfectly on my computer and on my husband’s computer. I have a feeling some of these people are not copying and pasting the whole code. Janet
It works like a charm on my desktop and my laptop. Great tip!
This time it worked, exactly the same procedure and same info I copied… Go figure! Whatever the reason, all is well.
Mine wont work as well it says
The string is missing the Terminator
+ CategoryInfo : ParserError: (:) [], ParentContainsErrorRecordException
+ FullyQualifiedErrorId : TerminatorExpectedAtEndOfString
And before you say it I did copy the whole string
powershell.exe -NoExit -Command “& {Checkpoint-Computer -description “MyRestorePoint” -restorepointtype “Modify_Settings”}
Terminator errors usually occur when you’re copying HTML and pasting it into a plain text-only application, like a command prompt or PowerShell. Copy the command and paste it into NotePad and then copy the code from left to right. Windows adds a space when copying right to left.
That did the trick Sir seems I was doing it the wrong way, thank you very much.
I could not make your note work so I went back to one of your older notes and tried that. It worked. So, for whatever reasons, i haven’t a clue, thank you because I now have a system restore shortcut.
Funny thing. I was just a FYI tip. You can create a restore point almost as quickly by typing CREATE in taskbar search, press Enter and create a restore point.
Worked on both of our computers. Only took a few seconds. Thank you for the tip!