How to Do a Windows 10 Cloud Reset
When your PC starts running poorly and you’re having multiple problems with your computer, a Windows 10 Reset can be the easiest and best way to get your PC working well again. We’ve had to reset our own computers after experiencing a series of problems with them.
If you start having multiple issues with your computer, you can try to fix them one by one… but sometimes, by the time you get done fixing those problems, new problems arise. If you’re having computer troubles like these, a Windows 10 Reset is a good option, and doing a cloud reset is even a better one.
When you choose the cloud download option to get Windows from the cloud to reinstall Windows 10, instead of reusing the existing Windows files to create a “refreshed” copy of Windows — as the Reset option has worked in the past — you get a more reliable way to reinstall Windows.
Using the cloud download option is essentially the same as installing a fresh copy of Windows 10 from a USB flash drive or DVD installation disk. And doing a cloud reset gives you the option to keep all your personal files and folders. It’s like doing a “clean install” of Windows 10 without losing your files.
We do want to point out that you’ll have to reinstall the programs you installed. But Windows even makes this easier by leaving a list of programs that were removed on your desktop so you can see what programs were removed and reinstall the ones you want.
How to do a cloud reset
1. Right-click the start button and click “Settings”.
2. In “Settings” click on “Update & Security”.
3. In Update & Security click on “Recovery”. And then click on the “Get started” button…
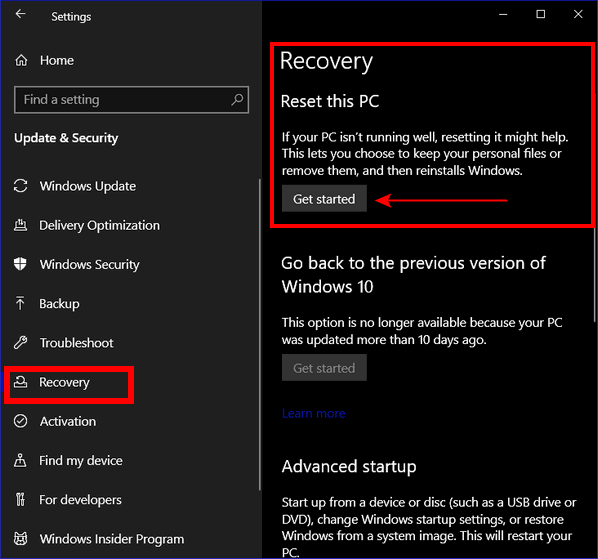
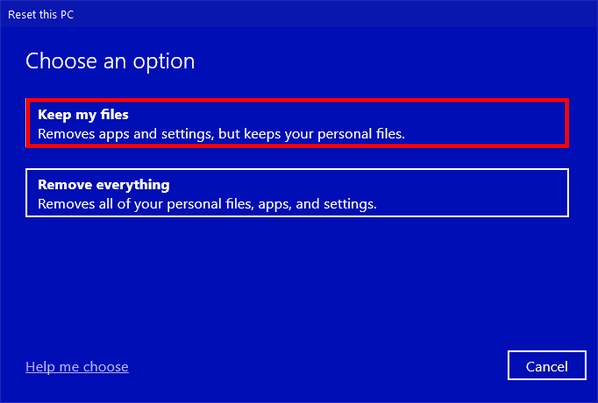
4. The next dialog you’ll see, gives you the choice of reinstalling Windows 10 and keeping your personal files or reinstalling Windows 10 and removing everything.
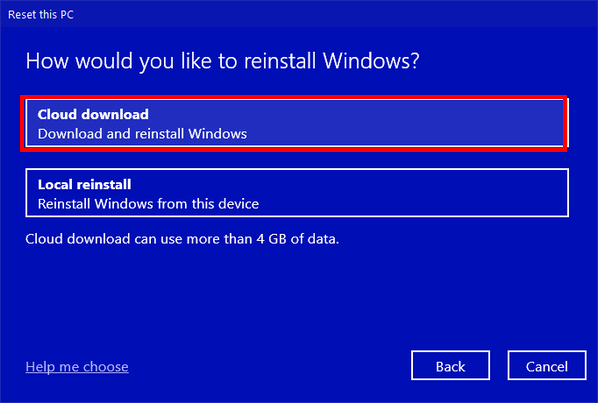
5. The following dialog lets you choose between a cloud reset or a local reset. If you have a fairly fast internet connection, the cloud download option is the best option.
6. Once you click on the cloud reset option, you’ll see a confirmation screen like this one. Click “Next” to continue.
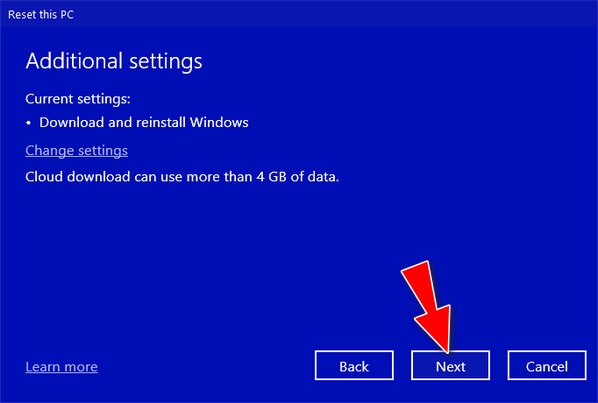
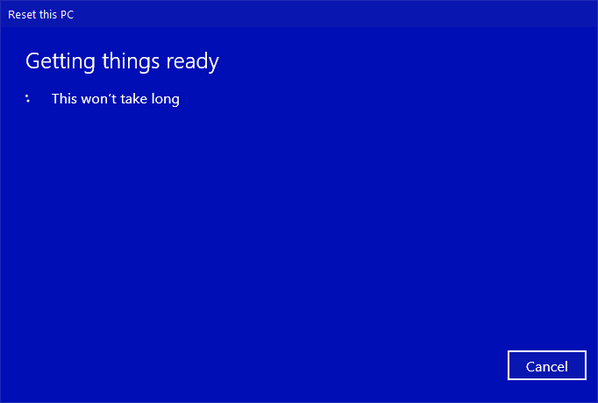
7. The wheels are in motion… You’ll notice you can still cancel the reset operation at this point should you choose to do so.
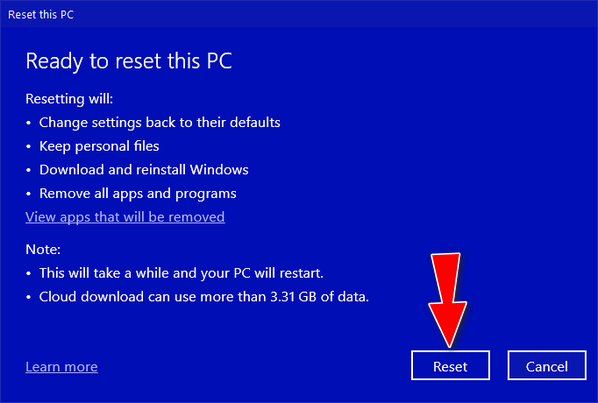
8. You’re almost there… The final screen you’ll see before the reset begins gives you a summary of what’s going to take place. You can even see what programs and apps will be removed. And remember, after the reset is complete. you’ll find a file on your desktop containing a list of all the programs and apps that were removed. This should be a guide for you – you don’t have to reinstall everything on that list – most of us have programs and apps installed we seldom or never use.
The reset will take anywhere from 45 minutes to an hour or longer. Your computer will restart several times. Once you click the “Reset” button, the reset is automatic – you’re on autopilot, I tells ya!
After the reset is complete, you’ll find your personal files right where you left them – but you will be using a brand-new copy of Windows 10. And if all went well, your computer should run like a new one.
Oh, and one more thing… If the reset fails for any reason, your computer will be returned to the state it was in before you started the reset.

