How to Fix Windows Internet Connection Problems (Windows 10 & Windows 11)
When your Internet connection starts dropping or when you have trouble getting or staying connected, it can be annoying. And if you only have one connected device, not being able to access the Internet, means you can’t even get online to check for help.
In this article, we’re going to cover several ways you can fix your internet problems including completely resetting your Windows 10 or Windows 11 network settings. Remember though, resetting your Windows network settings should be the last thing you try – and only after you’ve tried everything else we cover here.
1. Make sure it’s your computer’s problem. If you have another device in the house like a tablet or smartphone and it cannot connect either – it’s not your PC – it’s your internet provider or your equipment. If your Internet connection is not working at all for any device, call your ISP. If it’s just your Widnows computer that cannot connect then move on to step #2.
2. Power cycle your modem/router. See our article about power cycling here.
If you’ve found no joy so far, move on to step #3.
3. Run the Windows Network Troubleshooter – Type NETWORK TROUBLESHOOTER into the taskbar search. Press enter when you see “Find and fix network problems” appear in the search results, press Enter or click “Open”.
If, after running the troubleshooter, you still cannot connect, then it’s time to try resetting all Windows network settings. This will remove and reinstall all your network adapters and reset all networking components back to their default settings. If you’re using a Wi-Fi connection, you may need to enter your Wi-Fi password after you do a network reset, so make sure you know what your wireless password is before you begin. See our article here to learn how to find your Wi-Fi network password.
How to Completely Reset Windows 10 Network Settings
1. Open Settings ( type settings in the taskbar search or right-click the start button and click “Settings”)
2. In Settings click on Network & Internet. Under Status, near the bottom, click Reset network.
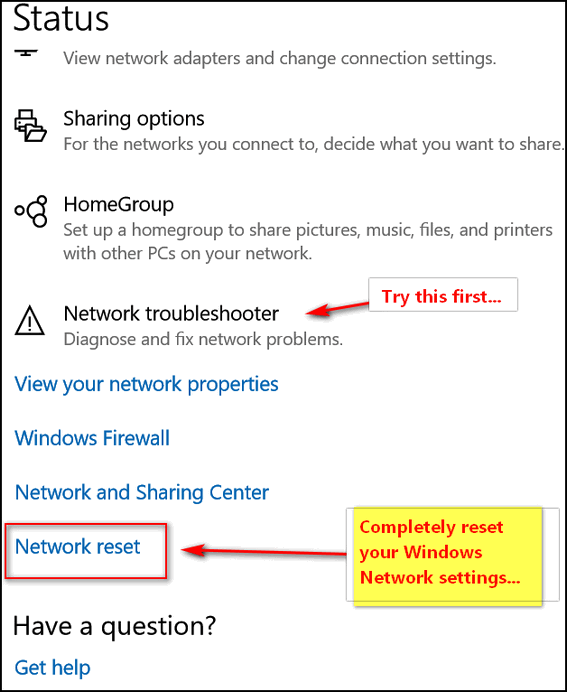
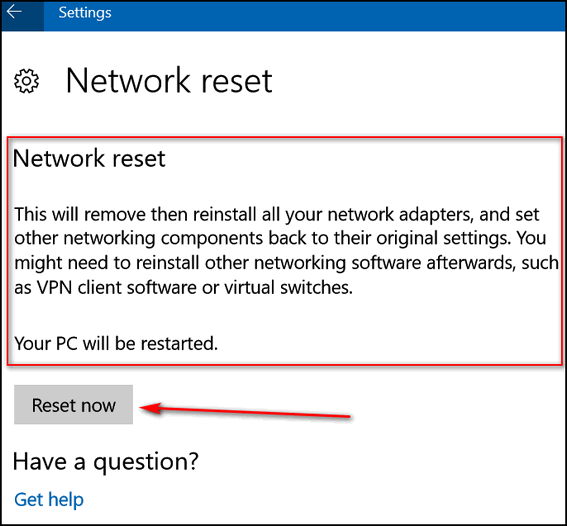
If you want to proceed, click on the “Reset now” button. Windows will remove all network adapters reinstall them and n all your network settings back to their original values.
How to Completely Reset Windows 11 Network Settings
1. Right-click on the Internet connection icon in the taskbar’s notification area (the area nearest the clock).
2. On the Network & Internet page that opens, click on “Advanced network settings”.
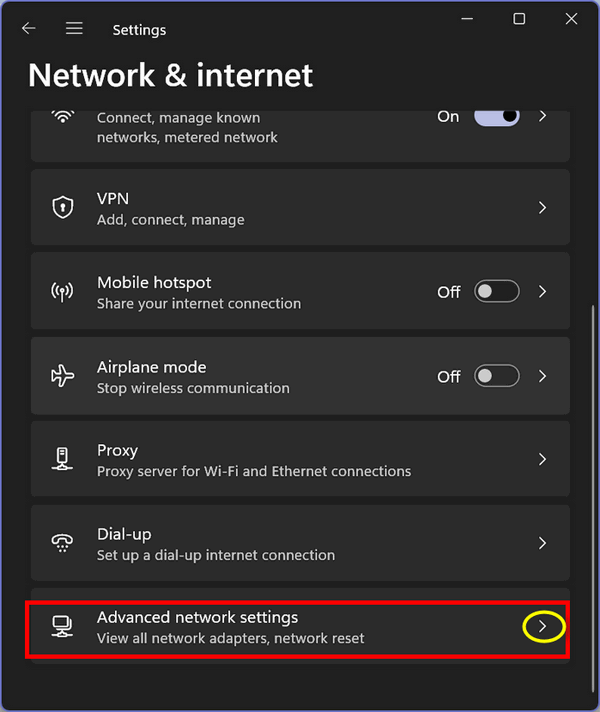
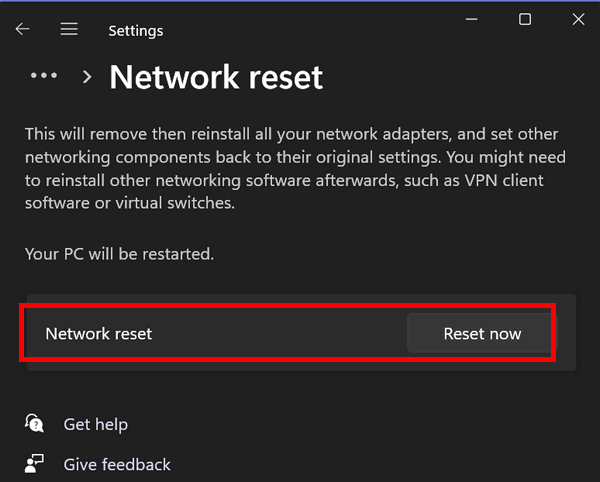
3. In the dialog that opens, click on “Network reset”.
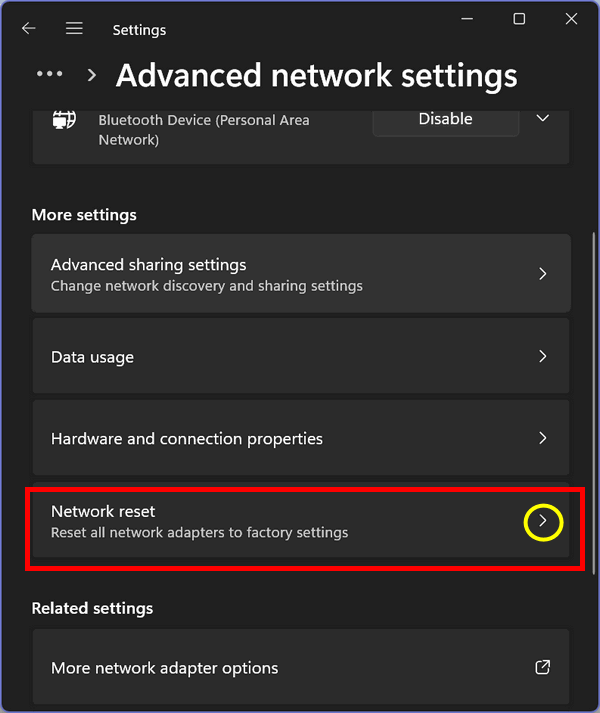
If you want to reset Windows 11’s Network settings, click on the “Reset now” button. Windows will remove all network adapters reinstall them and return all your network settings to their original values
IMPORTANT REMINDER!
Make sure you know what your Wi-Fi network password is before you begin. You may need it to log in to your Wi-Fi network once it is reset. Doing a Network reset does not change your Wi-Fi password. Your Wi-Fi password can only be changed in your router’s settings.
Don’t have a Cloudeight SeniorPass? It’s a great deal. Learn more here.
Our Cloudeight SeniorPass is a great deal. You get unlimited support for one full year from the date you first use your SeniorPass. We can help keep your computer running well, fix all kinds of computer problems, clean up malware, and a whole lot more. Our SeniorPass is like having insurance for your computer. And it’s only $99 for an entire year.
To learn more about our SeniorPass, please see this page.


