
Viewing and installing fonts on Windows 10 and Windows 11 is quick and easy. It’s a big improvement from previous versions of Windows.
To view the fonts on your Windows 10 computer, type Fonts in taskbar search and press Enter. On Windows 11, the best way to view your fonts is going to Settings > Personalization > Fonts. Curiously, if you type “Fonts” in Windows 11 taskbar search (or Start menu search), it opens Control Panel > Fonts, which does not give you a very good view of your installed fonts. Gee! I thought Microsoft was ‘deprecating’ the Control Panel.
You’ll see all the fonts installed on your computer system and displayed exactly as they will appear when you use them.
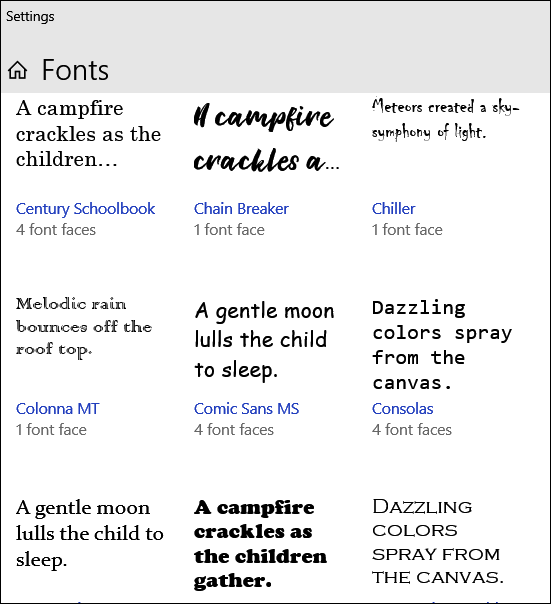
Above: Fonts displayed in Windows 10.
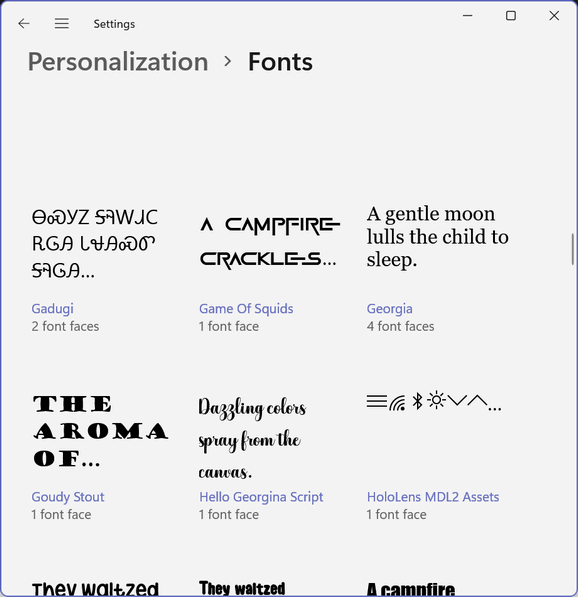
Above: Fonts in Windows 11. Notice the top-row disappears as you scroll down. Obviously, a bug in Windows 11.
Installing fonts on Windows 10 or Windows 11 is a snap. The biggest challenge with installing fonts in Windows 10 and Windows 11 is finding good free fonts from above-board sites that don’t bundle malware or other software with the fonts.
Here are three free fonts sites we have tested and found all 3 to be free of trickery.
DaFont
https://www.dafont.com/
Thousands of fonts, easy to download. Fonts come in a zip file with nothing inside but the fonts, and sometimes a “readme” text tile and/or a graphic of the font. No malware. No tricks.
Google Fonts
https://fonts.google.com/
Google Fonts is a great site. Thousands of fonts. However, downloading fonts from Google takes some getting used to. Persevere and you’ll find some great fonts to download from Google – and Google Fonts is one of the only where all fonts are free for home or commercial use.
FontSpace
https://www.fontspace.com/
There’s a very nice search feature on this site to help you find a font by name. Fonts are in zip files. They’re easy to download. All fonts here are free, but most are free for home (personal) use only.
Moving right along. Finding good free fonts is the hard part… trying to find a good free font site and browsing through all the fonts can be time-consuming. But if you love fonts, that can be a labor of love.
Now for the easy part. Installing fonts on Widnows 10 and Windows 11.
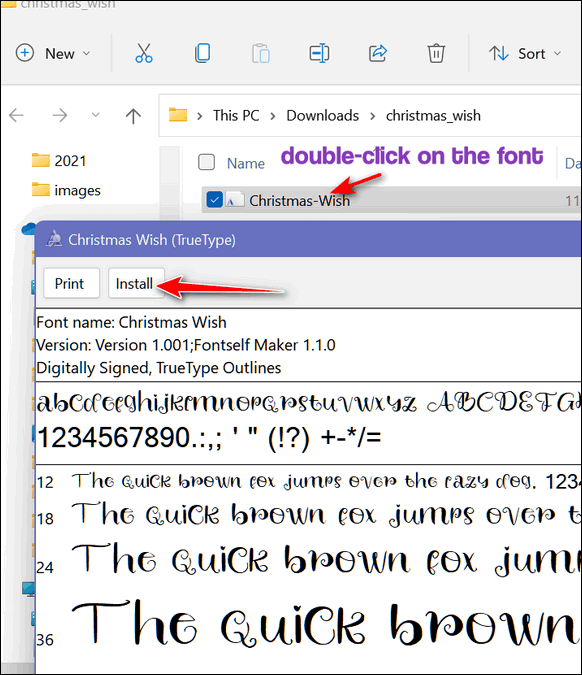
We downloaded a font in a zip file from DaFont. Then we unzipped the file and double-clicked on the font file.
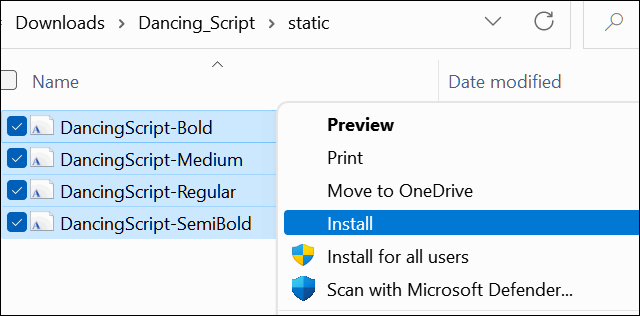
Or if you choose you can install multiple fonts all at one time by selecting them all and choosing “Install” or “Install for all users”. From the right-click menu. In Windows 11, when you right-click the font file(s) you get the truncated Windows 11 context menu, you’ll have to click “Show more options” to get the full context menu…
For this post, I’ve chosen a Christmas font (Christmas Wish from Dafont.com). I downloaded it and installed and I can view it in Settings > Personalization > Fonts…
You can search for the font you downloaded or any font you have installed. Also, note that you can drag and drop fonts here to install them.
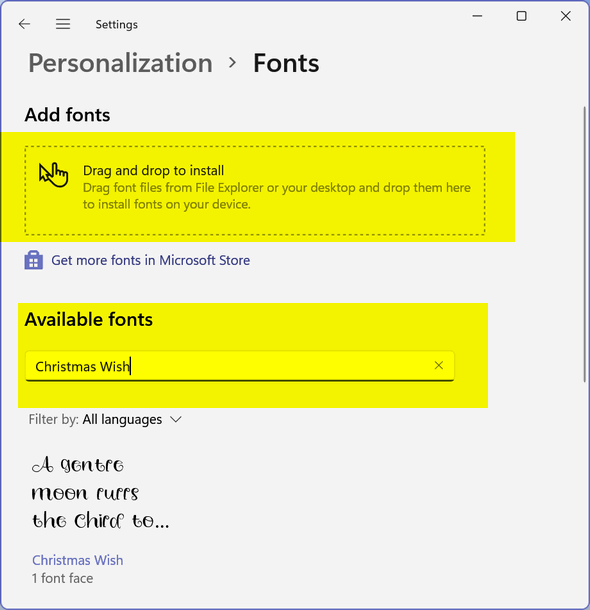
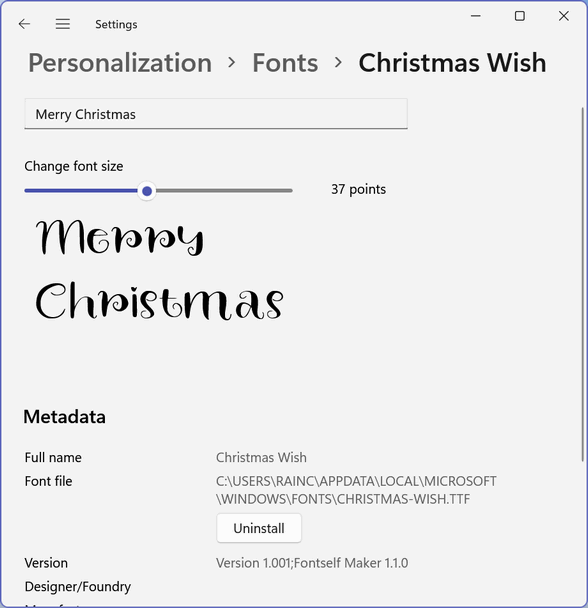
Once you find your new font, you can see what it (or any font) looks like by typing a word or sentence in the text box and using the slider to make the font larger or smaller. In Windows 11 you need to click on the font preview to open the preview text box and font-size slider.
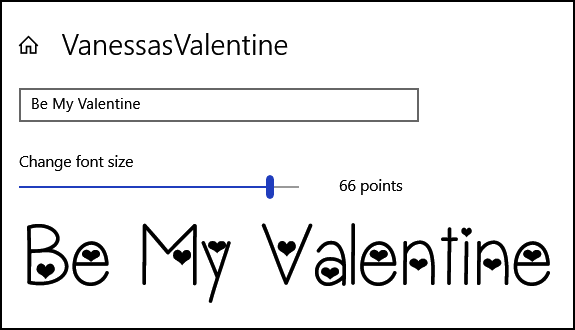
In Windows 10 the font, preview text box, and slider are all on the same page.
Using your new font. The fun stuff!
Once you’ve installed a new font, you can use it in any application that allows you to select fonts. Here, I’m using my new “Christmas Wish” font in my very old version of PaintShop Pro, on Windows 11. Ain’t it pretty?

Now you know all about downloading, installing, previewing, and using fonts on Windows 10 or Widnows 11.
Have fun!

